Blog
Chapter 4 – Electrical Wiring and Campervan Insulation

Oct
Electrical cables and insulation for BeVan
After making heart breaking holes into van, we moved on another tasks: Electrical wiring and Campervan insulation for BeVan.
Again, now it looks pretty easy, but looking back it was a time-consuming activity and we explain you why below.
Electrical Wiring – 12V and 240V
We spent a bit of time searching for information about 12v wiring and planning where the fridge, heater, fan, 12V sockets will be
We had to think about what sizes of cables we need and what material they need to be made of according EU and Slovak safety regulations before we actually started installing electrical cables into the living space of the van.
After all we chose stranded core cable types for our needs:
- 16mm2 110A cable coming from van battery to CTEK – stay tuned with us, we will explain all about wiring scheme in upcoming Blog 5
- 10mm2 70A cable for main wiring for leisure batteries, solar charge controller (MPPT) and CTEK
- 5mm 3-core cable for 240V socket
- 5mm 2-core cable for all 12V appliances
Then we had to think deeply where every single appliance will be and make sure we left enough length of cable for it (well, not always it was enough!)
We do recommend to make at least wiring photo documentation to know where you cannot drill holes and in case of potential electrical issues in future. Luckily, we did photo documentation for our BeVan Slovakia.
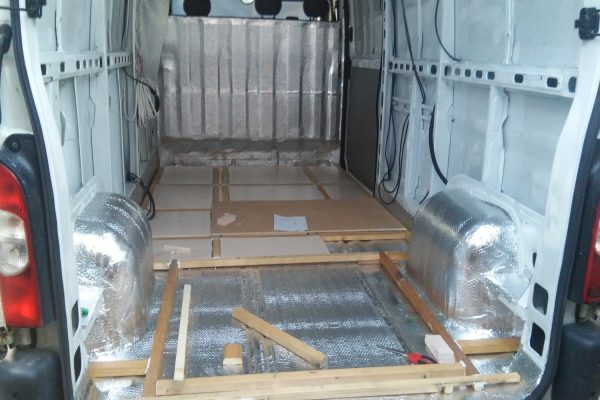
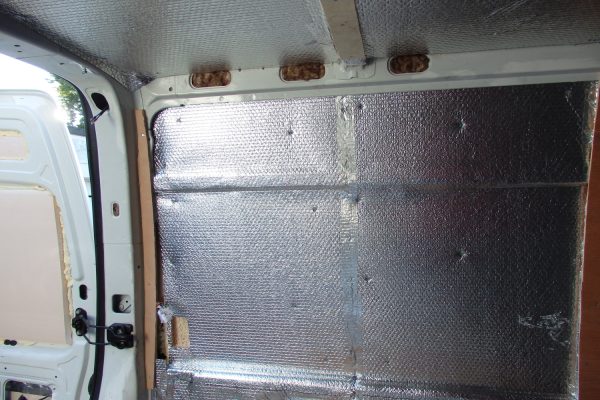
Campervan Insulation
Another not easy task! There is so many choices and varieties of insulation out there! To make up your mind, you need to consider a lot of factors, we mean a LOT. Let’s check it out.
- The last but not least factors to consider are these: Where you tend to use your campervan – Geographical location?
- Do you want to use it for leisure or for live in accommodation – Van Life?
- What is maximum thickness of insulation you can use in your van?
- Are you looking for ECO friendly option?
- What is your budget?
It might be interesting for you reading about insulation in this Guide.
We used combination of the following:
- 50mm Extruded polystyrene (XPS) for floor and walls,
- 20mm Rigid Insulation boards with aluminium foil (not lost a much of height inside van),
- 100mm Fibreglass insulation used in hard to reach places as ducting in van,
- Insulation foam used to glue board and fill any small and medium gaps,
- Double aluminium bubble insulation foil and vapour barrier.
Specifically, last used layer of double aluminium bubble foil is another layer of insulation, equivalent of 50mm insulation and vapour barrier at the same time. Glue it with high temperature spray glue as TrimFix straight to the insulation boards or van’s metal.
And that’s it for this time … 😊
