Blog
Chapter 3 – Scary cutting into Van

Sep
Cutting the window and ventilation holes
Cutting holes into van for window, fan, kitchen extractor, bulk head. Scary, but needs to be done!
Getting courage
This time we literally got into the van through its metal.
After stripping down the van from all the wood we had another challenge in front of us which was to make more space, window and ventilation in the van. Window is legally required when you want your converted self-build campervan to be re-categorised and have your documents valid to officially enjoy VanLife in Slovakia or anywhere in Europe.
Because we are driven by our sometime crazy ideas, we love to overcome the most adventurous challenges which in this part of conversion was cutting holes into the van. Yes, literally we mean to cut a window, bulk head and ventilation holes in the roof.
It looks quite a fun, but for the first time it is not! You feel kind of sick about it. Honestly, picture yourself as going to drill and cut a piece of the roof or side of your car/van. Are you still feeling right about it?
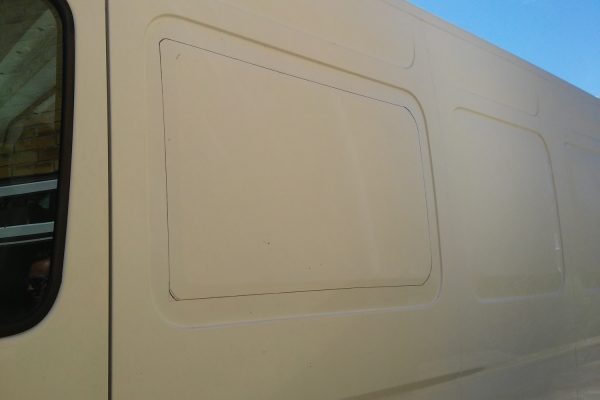
To make the BeVan Slovakia 🚐 as comfy and safe as possible, we bought certified side opening privacy window made from tempered glass, which is fully approved in European Union. This window is specially designed for Renault Master according to body work. It is not cheap, we paid about £200 for window, but it is the best what we could find on market. There are plenty cheaper, plastic window options, which do not open as much as this.

Cutting hole for window
We made DIY cardboard template in window size, which helped us to draw a line on the van. And the drilling could start 🤪.
We used tools like power drill to cut the corners, jigsaw for main cutting and angle grinder to have smooth finish of edges. Unfortunately first hole made for window was too small, so we had to cut a little more to meet the exact size of the window to fit. Then we fitted black trim on edges, glued and sealed it with special window bonding kit. Secured it with tape against movement for overnight. Morning it looked like window was there from beginning.
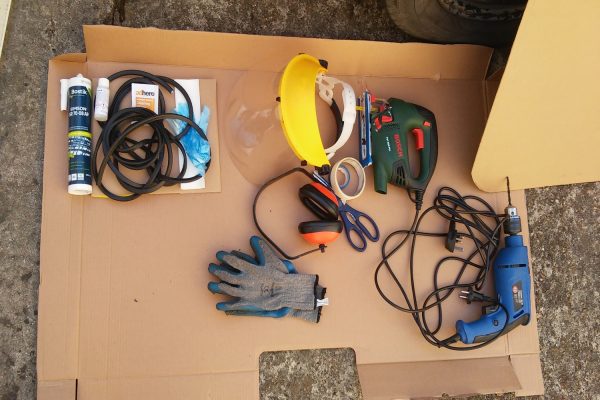
This bonding kit you can buy online or in a car window repair shops. It contains: Primer for metal frame on which window will sit, Bonding adhesive (you might need more than 1 tube, depending on size of your window or quantity of them), trim which is fitted on sharp edges and mainly to get better look from inside of the van and instructions which are pretty straightforward.
Greatest think about this cutting challenge is that you feel like hero 💪 who can do anything from now on!
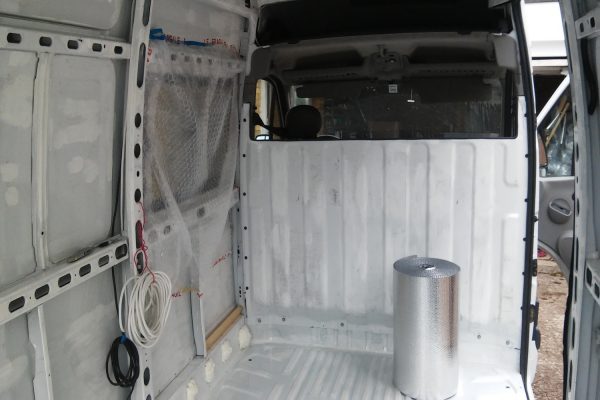
Cutting bulkhead and roof vents
After fitting window, we were also ready to remove the bulk head completely to make the van step free, but thanks to how hard it was to reach areas with angle grinder, we removed just the top part of it. And it was good decision afterwards. The reason is that the van remains more sturdy with it and you can make more arrangements on inside taking into account that your seats in the cabin do not rotate.
We carried on cutting holes for Fiamma roof vent and kitchen extractor on the roof of BeVan. Just took measurements and draw them on the van and cut.
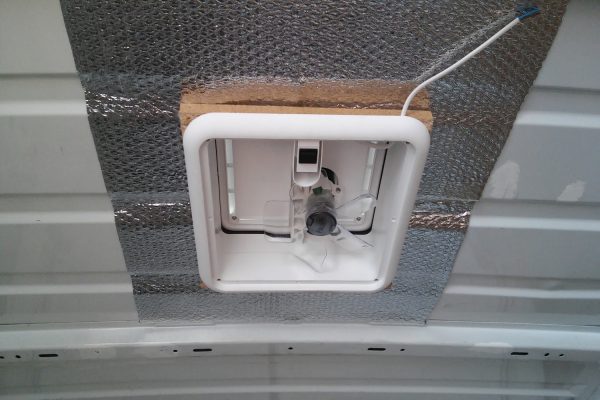
How simply it sounds now!
Please remember old basic rule: Measure twice, cut once!
Take your time, make templates, draw helping lines or anything what can help you to avoid making mistakes!
As if you cut bigger hole than needed, then there is more hassle to fix it. And you cannot just use any silicone to redo it.
